Portable Grill Marinade Science: Flavor Penetration Physics
By Mateo Salazar • 17th May
Portable grill marinade science isn't about secret sauces; it's about understanding flavor penetration physics and picking marinade absorption techniques that actually work under portable, time-crunched conditions.
You're hauling a portable travel grill to parks, trailheads, or tailgates. Cooler space is tight, timelines are fuzzy, and once people are hungry, every extra minute feels like ten. If it fumbles, it fails. Time is your hot coal. The goal is a workflow that delivers real flavor from pack to plate in minutes, without messy guesswork.
This guide breaks down what marinades can really do, how far they actually penetrate, and how to design quick marinade methods and small-batch marinating systems that match the way you move. For pack-friendly prep and transport, see our leakproof prep system.
1. What a Marinade Actually Does (and Doesn't)
Forget the myth that an overnight soak magically flavors meat "all the way through." The science is more limited, and more useful.
1.1 Meat is mostly water
Most raw meat is about 70-75% water. That water already fills most of the space inside the muscle fibers. There isn't much room for extra liquid to seep in, so classic "soaking" is less effective than people think.
1.2 Three key players in every marinade
Think of a marinade as three overlapping tools:
-
Salt (and salty liquids)
-
Small ions that diffuse relatively well.
-
Draw water toward the surface at first, then help the meat hold onto moisture during cooking.
-
Actually penetrates millimeters to centimeters over hours.
-
Acid (vinegar, citrus, wine, yogurt, etc.)
-
Loosens and slightly unwinds surface proteins.
-
Brightens flavor and helps browning.
-
Too much, too long -> mushy, chalky exterior.
-
Aromatics & fat (garlic, herbs, spices, oil)
-
Most flavor molecules are big and mostly stay near the surface.
-
Oil helps dissolve fat-soluble flavors and improves surface browning.
-
Excess oil over a small flame = flare-ups, especially on compact grills.
The key reality: salt is your deep worker; nearly everything else is surface flavor.
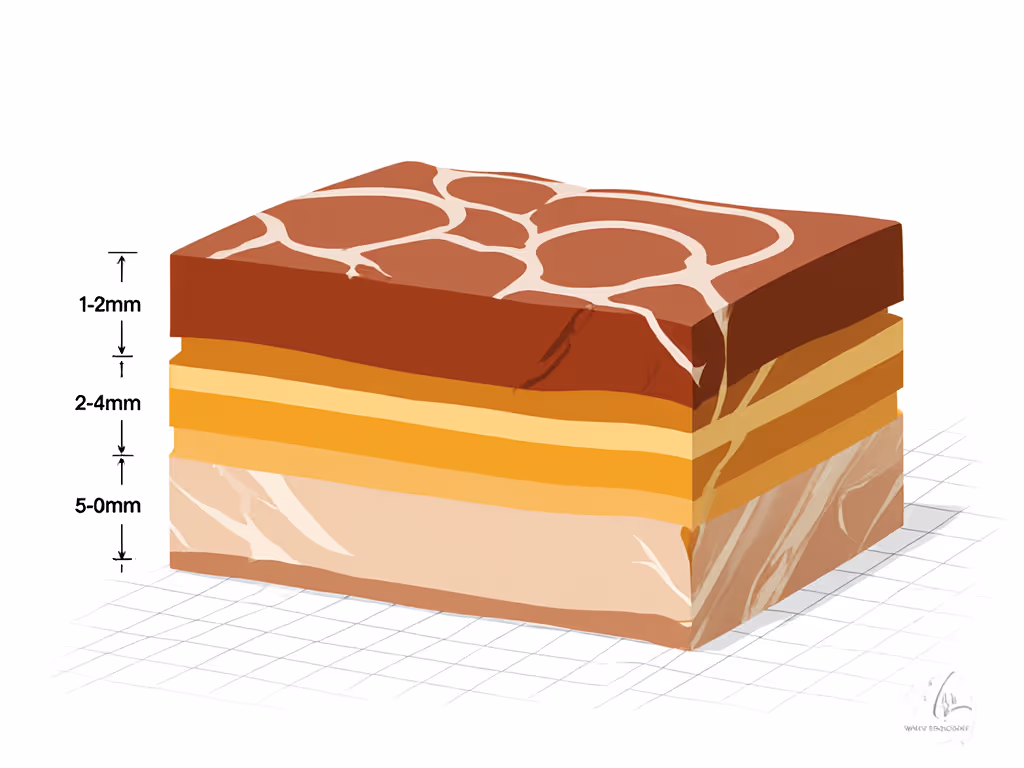
1.3 How far does flavor really penetrate?
Lab and kitchen tests converge on the same pattern for typical cuts:
- After 30 minutes: flavor penetration is roughly 1-2 mm from the surface.
- After 2-4 hours: 2-4 mm.
- After 12-24 hours: you may reach 5-10 mm, mainly for salt.
A standard chicken breast or steak can be 20-40 mm thick. That means even long soaks mostly enhance the outer 10-30% of the thickness.
For a portable workflow, that's good news: with the right design, short marination windows can deliver serious flavor.
2. Flavor Penetration Physics for Portable Grills
On the road, you rarely have luxury timing. You're dealing with:
- Short windows (30-90 minutes between leaving home and lighting up).
- Limited space for bulky containers.
- Hotter, closer flames on compact grills that punish sugary, oily marinades.
Here's how to make the physics work for you.
2.1 Separate salt from everything else
Since salt is the only reliable deep-penetrating player, give it its own head start.
Setup timer (ideal):
-
T-24 to T-12 hours: Dry salt or brine
-
Lightly salt meat on all sides (about 0.5-0.75% of meat weight if you like numbers).
-
Bag and refrigerate. This is basically a low-effort "dry brine."
-
T-2 hours: Add marinade
-
Now add your aromatic + acidic marinade to the bag.
-
You're mostly tuning surface flavor and browning, not depth.
If you can't pre-salt that far ahead, even 60-90 minutes with salt on the surface is better than a last-second soak.
2.2 Thickness and surface area: your two cheat codes
For fast flavor on a portable travel grill, you win by shortening the distance flavor has to travel.
- Go thinner: choose 1-1.5 inch (2.5-4 cm) steaks and chops, or butterfly thicker chicken breasts.
- Increase surface area:
- Cubes for skewers/kebabs.
- Thin flaps of flank, skirt, or bavette.
These shapes cook faster and give more surface per bite, where your marinade is doing most of its work.
2.3 A portable-friendly salt + acid + aroma ratio
For direct, relatively high heat on a compact grill, a robust all-purpose ratio per 1 pound (450 g) meat:
- 2 tsp salt (less if pre-salted earlier)
- 2-3 tbsp acid (citrus, vinegar, or wine)
- 1-2 tbsp oil (enough to carry flavor, not enough to cause a grease fire)
- 1-2 tsp sugar or honey, max (or none (more on that later))
- Herbs, spices, garlic, chili: to taste
Stick close to this and you'll minimize out-of-control charring and flare-ups.
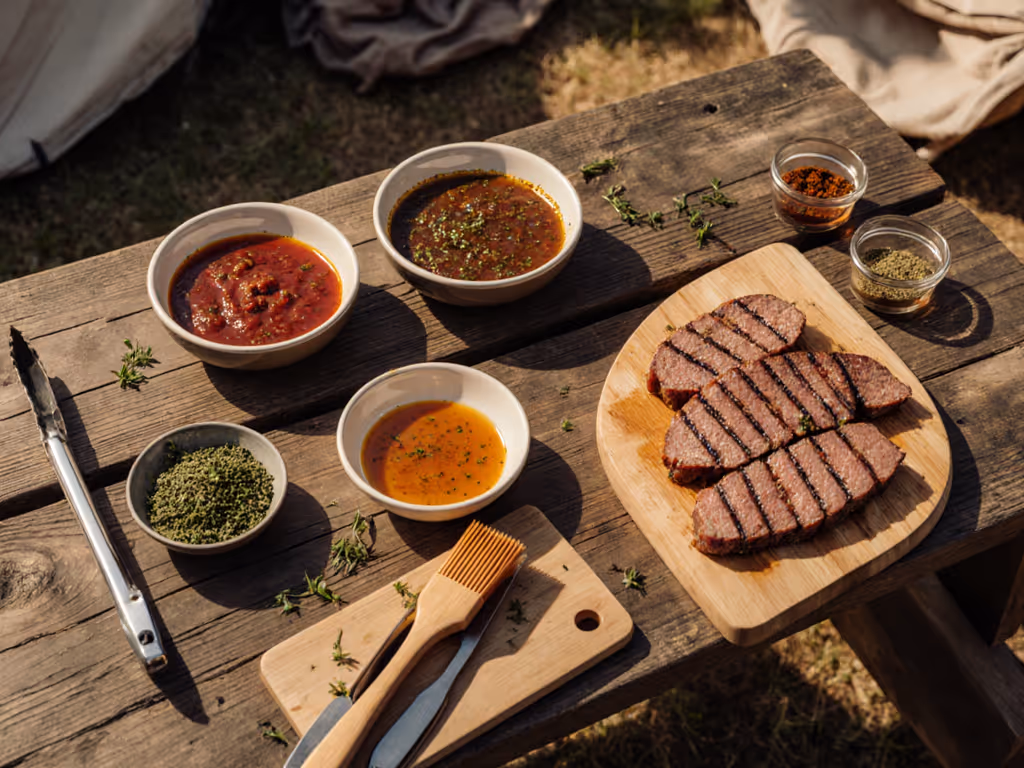
3. Practical Marinade Absorption Techniques for the Road
Now we turn theory into a workflow diagram you can repeat without thinking. Simple, quick, reliable.
3.1 Small-batch marinating for mobile life
You don't need tubs of liquid sloshing in the trunk. You need tight, efficient contact:
- Use zip-top freezer bags or small locking containers.
- Target ¼ to ⅓ cup (60-80 ml) marinade per pound of meat.
- Squeeze out excess air, press the bag flat so everything is in a single layer.
- Label bags with a setup timer ("Chicken - citrus herb - T+0 = 4:30 pm").
Flat bags stack neatly in a cooler, don't rattle, and marinate more evenly than deep bowls. Then dial in cook timing with our small-batch cooking guide.
3.2 The massage + flip protocol
When you don't have 12 hours, agitation is your friend.
For a 60-90 minute window:
- T+0: Add meat and marinade to a bag, seal almost fully, squeeze out air, seal.
- T+0-1 minute: Massage the bag, pressing marinade into all surfaces and seams.
- T+30 minutes: Flip bag, massage again for 30 seconds.
- T+60-90 minutes: Remove, pat meat dry, cook.
That light pressure helps fresh marinade circulate into crevices and along fibers, boosting surface uptake without gadgets.
3.3 What about stabbing or scoring?
- Shallow scoring (light crosshatch cuts, only 2-3 mm deep) on thick steaks or fatty cuts can increase surface area without wrecking texture.
- Deep stabbing with a fork all over is a mixed bag: it can cause uneven juicing and a mushy exterior.
For portable setups where you need consistency and minimal mess, stick to mild scoring and thin cuts rather than aggressive puncturing.
4. Quick Marinade Methods When You're Already at the Park
Sometimes the clock has already started: you open the cooler and realize nothing is marinated. You still have options.
4.1 The 30-minute emergency plan
You realistically get flavor in the outer 1-2 mm. So we bias heavily toward surface punch.
T+0 (arrival):
- Lightly salt all sides of the meat.
- Mix a high-impact marinade:
- Salty base (soy sauce or Worcestershire)
- Bright acid (lemon/lime or vinegar)
- Finely grated garlic/ginger or strong dried spices
- Small amount of oil
T+5:
- Bag meat with marinade, massage thoroughly.
T+25:
- Light grill according to the manual; you want it ready right at T+30.
T+30:
- Pat meat dry, lightly oil the grate, and cook.
You're not chasing depth here. You're engineering a powerful, browned, tasty exterior that makes every bite feel seasoned.
4.2 Veggies, tofu, and thinner proteins: your best friends
When your portable schedule is tight, lean on items that respond fast:
- Vegetables (zucchini, peppers, onions, mushrooms, eggplant) eagerly pick up surface flavor in 15-30 minutes.
- Tofu (especially extra-firm, pressed) takes on marinades quickly through its porous structure.
- Shrimp, fish fillets, and thin cutlets need only 10-20 minutes in marinade; longer can over-soften them.
These are perfect for small-batch marinating in tiny bags, and they grill fast over a compact flame. For delicate fillets on compact grates, see our portable fish basket guide.
5. Matching Marinade to a Portable Grill's Heat Profile
Portable grills often mean:
- Shorter distance between flame and grate.
- More hot spots, especially in wind.
- Smaller drip zones, so rendered fat and oil collect fast.
Your marinade has to respect that environment.
5.1 Managing sugar and oil to avoid flare-ups
- Sugar (honey, brown sugar, syrups) starts to burn around 300-350°F (150-175°C) and can blacken quickly over direct flame.
- Excess oil drips, hits flame, and sends up big flare-ups that char the outside before the inside is safe.
Portable-friendly strategy:
- Keep sugar low in the main marinade if you're cooking directly over the flame.
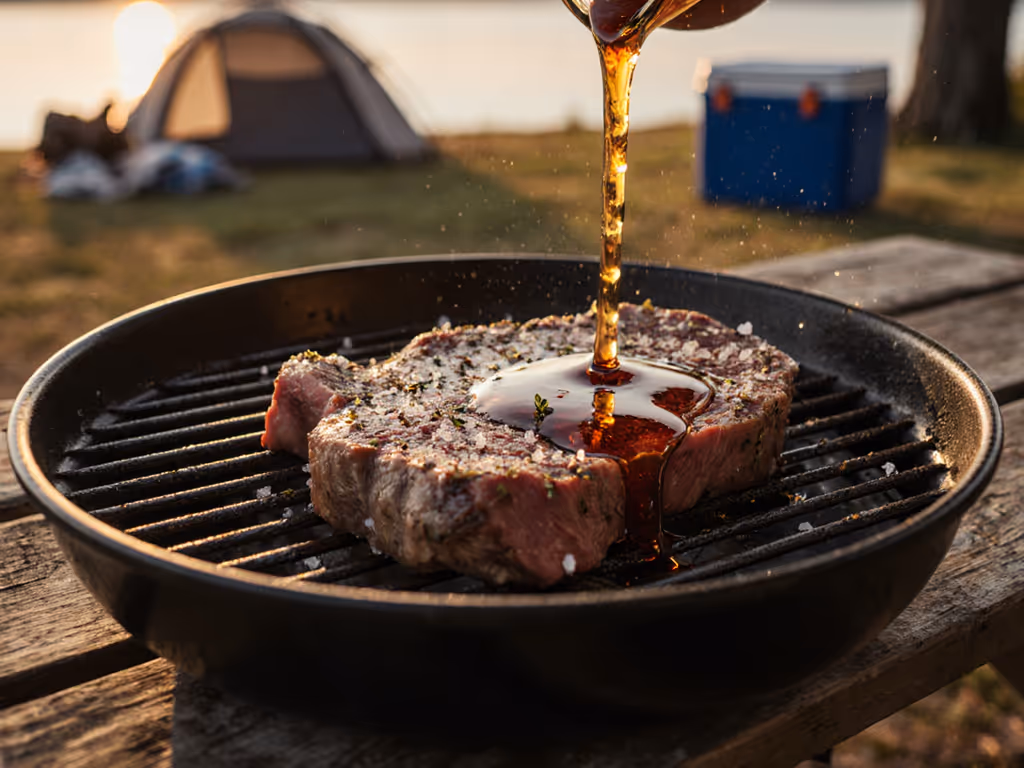
- Add sweetness with a finishing glaze or sauce in the last 1-2 minutes or right after grilling.
- Use minimal oil in the marinade; instead, lightly oil the grate just before cooking.
Always follow your grill's manual on maximum safe grease and cleaning intervals; portable fire + greasy drip tray is not a combo you want to improvise with. For a fast routine that prevents flare-ups, use our portable grill cleaning guide.
5.2 Pat dry for better sear and less sticking
Water on the surface has to evaporate before browning kicks in. If your meat is dripping wet from marinade, you'll steam instead of sear.
Right before grilling:
- Remove pieces from the bag.
- Pat dry with paper towels.
- Very lightly oil the food or grate.
- Then hit the grill.
This single step often cuts a minute or two off browning and reduces sticking. Small gains that matter when a crowd is watching.
6. A Repeatable "From Pack to Plate in Minutes" Marinade Workflow
Here's a simple, error-proof playbook you can memorize and adapt.
6.1 Ideal 24-hour workflow (home -> road -> grill)
T-24 to T-12 (at home):
- Portion meat into bags.
- Salt lightly and refrigerate.
T-4 to T-2 (still at home):
- Add small-batch marinade to bags (¼-⅓ cup per pound).
- Massage, flatten, stack in fridge.
T-2 to T-0 (travel window):
- Move bags to cooler with ice or cold packs.
- Pack grill, fuel, tongs, and a roll of paper towels in a clean layout that you can set up in under 2 minutes.
T+0 (arrival):
- Start grill according to manual; set a preheat timer (usually 5-10 minutes).
- While preheating, remove meat from marinade and pat dry.
T+10-T+25:
- Grill in batches sized to your grate.
- Rest meat a few minutes off heat before serving.
6.2 Compressed 60-minute workflow (you forgot to marinate)
T+0: Salt meat and mix a high-impact marinade.
T+5: Bag and massage.
T+35: Light grill and preheat.
T+45-50: Pat dry, grill.
You're still honoring the science, prioritizing salt, maximizing surface contact, and minimizing sugar/oil issues, inside a realistic, portable timeline.
Your Next Action: Run One Simple Comparison
On your next outing with your portable grill, run this quick A/B test:
- Batch A: Lightly salt chicken or pork 12-24 hours ahead, then add marinade 2-4 hours before cooking.
- Batch B: Same marinade, but mix and apply 30 minutes before cooking with no pre-salt.
- Keep cut thickness and grill setup identical.
- Ask a couple of people which batch is juicier and more flavorful.
You'll feel (literally) the difference that salt timing and surface physics make.
Once you've got that dialed, scale it to skewers, veggies, and seafood, and build your own modular marinade set that fits your cooler and your routes. When your workflow is clean and repeatable, your portable setup goes from pack to plate in minutes, and you can focus on the moment instead of fighting the process.