Outdoor Dessert Cooking: Portable Grill Oven Guide
By Mateo Salazar • 11th Mar

Portable travel grill setups have evolved far beyond burgers and steaks. Outdoor dessert cooking on a compact grill is not only possible, it is a game-changer for tailgates, beach days, RV trips, and weekend camps where a full-size oven simply is not an option. For a deep-dive into techniques and gear, see our portable grill dessert masterclass. The key is understanding that a portable grill's enclosed heat, when controlled properly, functions as an oven. Frictionless setup and reliable ignition transform these moments into the kind of meals (and memories) that matter.
Why Portable Grills Work for Desserts
A fundamental shift happens when you recognize that a portable grill with a dome lid or covered setup acts as a convection chamber. Unlike open-flame cooking, enclosed grilling traps heat evenly and allows baking temperatures to stabilize. This is why baking on portable grill surfaces works: the grill becomes a thermal box, not just a flame source.
Search-tested results show that simple desserts like chocolate fondant, grilled peaches, and camp-friendly treats transform under gentle, indirect heat.[1] What makes this workflow viable is the absence of three traditional friction points: no need for a separate oven, no electricity requirement, and no complex equipment. Pack the grill, pack a bread pan or cast-iron skillet, and you're ready. That's mobility. That's reliability.
For groups (especially when eyes and appetites are on you), slow, predictable dessert cooking beats a fumbled setup every time. If it fumbles, it fails. Time is your hot coal.
Temperature Control for Desserts: The Core Challenge
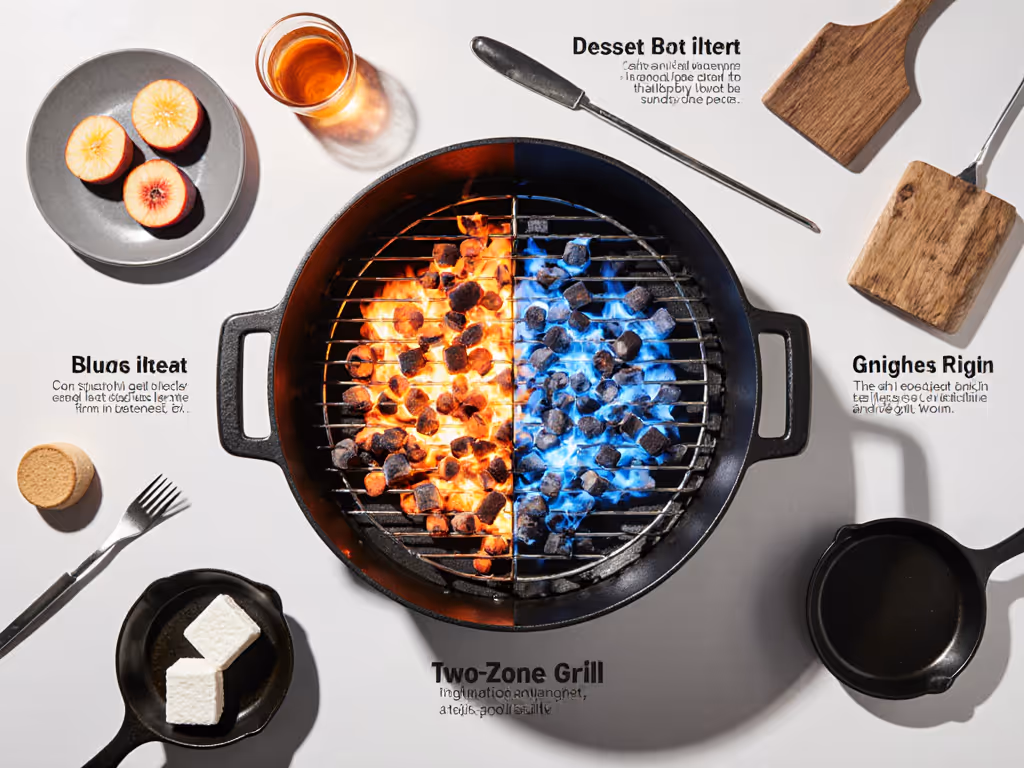
Temperature control for desserts is more nuanced than searing a steak. While a burger needs high, direct heat and speed, a chocolate cake needs low, steady, indirect warmth for 25-35 minutes. Portable grills excel here because their compact footprint makes it easier to create two-zone cooking: one side with direct heat for quick caramel or fruit char, and one side with indirect heat for baking.
Setting Up Two-Zone Cooking
- Direct zone: Place the heat source (or keep one burner lit on a propane grill) on one side. Use this for quick toasting of fruit or melting chocolate toppings.
- Indirect zone: Leave the opposite side unlit or with minimal heat. Place your covered baking vessel here. Aim for 325-375°F (depending on the recipe).
- Thermometer placement: Use an instant-read thermometer to verify the indirect side's ambient temperature before placing food. A 2-3 minute warm-up from dome closure is typical on small portable setups.
Windy conditions demand attention. For step-by-step wind fixes, use our windy-day grilling guide. A portable oven playbook includes simple fixes: move the grill to a sheltered corner, position the dome opening away from the wind, or use a lightweight windscreen if the manufacturer supports it. The goal is maintaining steady indirect heat, not fighting gusts every 30 seconds.
Grilled Dessert Recipes That Translate to Portable Setups
Not all desserts demand oven precision. Search-tested grilled dessert recipes range from 5-minute banana boats to 30-minute chocolate cakes.[1][2] The winners for portable grills share one trait: they tolerate minor temperature swings and do not demand split-second timing.
Quick-Cook Desserts (5-10 minutes)
Grilled Peaches with Honey and Cream: Halve ripe peaches, brush with honey and olive oil, grill cut-side down on a direct zone for 2-3 minutes until caramelized.[2] Serve with whipped cream or vanilla ice cream. Setup to plate in under 10 minutes. This is your proof-of-concept: if a portable grill can caramelize fruit perfectly, you have already solved 60% of dessert confidence.
Campfire Banana Boats: Split bananas lengthwise, stuff with chocolate chips and marshmallows, wrap loosely in foil, and place on indirect heat for 5-7 minutes.[3] The foil packet keeps mess contained and heat distributed evenly.
Medium-Effort Desserts (20-35 minutes)
Chocolate Fondant: Combine dark chocolate, butter, sugar, eggs, and flour; bake in a covered small cake pan on indirect heat for 20-25 minutes.[1] The result is a warm, molten center that feels indulgent despite minimal ingredients. Portable grill versions skip the need for ramekins or fancy plating, so just scoop and serve warm.
Anywhere Chocolate Cake: This name is literal.[1] Mix cake batter, pour into a bread pan, cover, and bake on indirect heat for about 30 minutes. Melt chocolate squares on the direct zone and spread as icing. No mixer, no kitchen, no fuss.
Show-Stoppers (45+ minutes)
White Chocolate Raspberry Cheesecake: Press a graham cracker crust into a bread pan, prepare the batter, pour it in, top with fresh raspberries, place the pan in a wok filled with hot water (a water bath), cover, and bake on indirect heat for 40-50 minutes.[1] The enclosed setup stabilizes temperature and prevents cracking. Dust with powdered sugar before serving.
The Setup Timer: One-Hand Ignition to Ready-to-Bake
Here is where portable grills separate reliability from regret. A professional tailgate operation (the kind where 20 people are watching) lives or dies on ignition confidence. Dead lighters and faulty spark systems turn moments into chaos. This is why one-hand ignition reliability matters: a push-button piezo igniter that clicks once and roars to life removes a variable.
Workflow breakdown:
- Unpack and position (30 seconds): Remove grill from bag. Set on level, stable ground. Position lid nearby.
- Inspect fuel source (15 seconds): Verify propane canister or charcoal is ready. No surprises mid-cook.
- Ignite one side (10 seconds): One-hand push-button ignition. If you are reaching for a lighter or matches, you have already lost momentum.
- Preheat indirect zone (2-3 minutes): Close dome. Let the indirect side stabilize to target temp (usually 325-350°F for desserts).
- Place food (20 seconds): Position your baking vessel on indirect heat.
- Set timer and step back (5 seconds): No hovering. Portable grill desserts are low-maintenance once heat stabilizes.
Total setup to baking: under 5 minutes. This is frictionless. This drives better meals and better moments.
Fuel Efficiency and Real-World Burn Rates
A portable propane grill typically burns 0.3-0.5 lb of fuel per hour on medium heat, a fact confirmed by frequent field testing. For a 25-35 minute dessert session, expect to use roughly 0.15-0.25 lb of fuel. A standard 1 lb propane canister supports 3-6 dessert-cooking sessions, making fuel cost-per-meal negligible.
Charcoal portable grills have different math: they produce more residual ash and take longer to cool, but they are often lighter to pack and do not require regulators or cold-weather workarounds. Choose based on your specific mobility constraint (backpack weight vs. trunk space) and local fuel availability.
Cleanup and Safe Pack-Away
The tail end of the workflow is where many portable setups fail. If cleanup takes 15 minutes, the whole experience deflates. Streamline your pack-away with our portable grill cleaning guide.
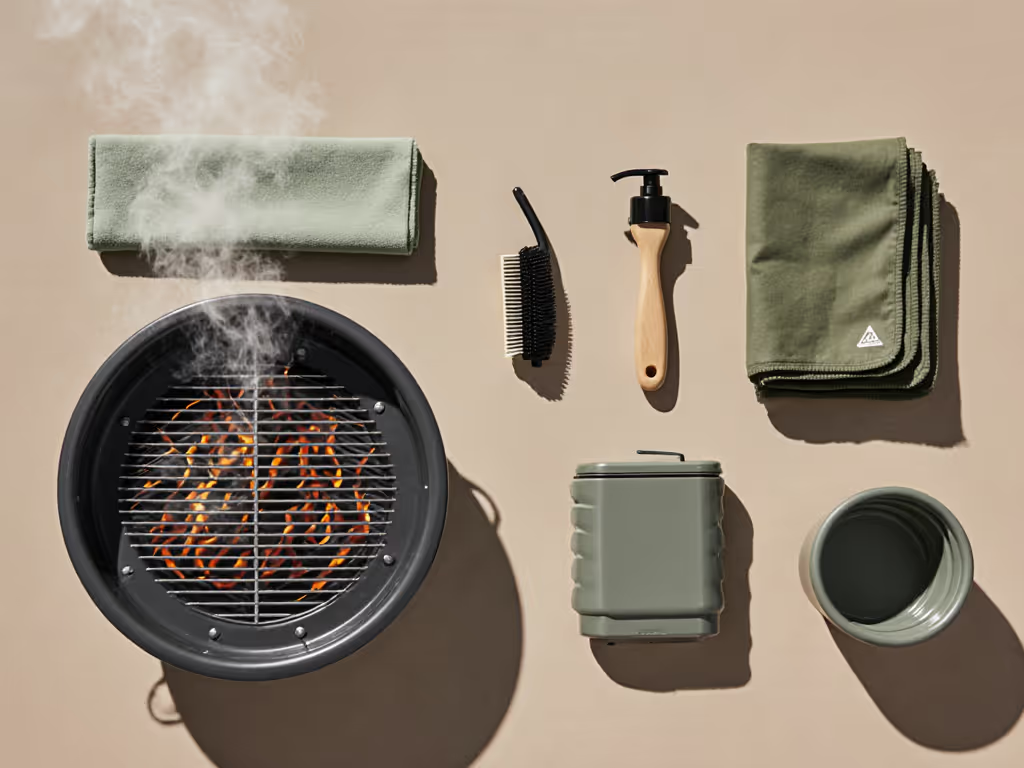
- While cooling (5 minutes): Wipe the grill grates with damp paper towels or a cloth. Any baked-on chocolate or fruit residue comes off easily while still warm.
- Grease management: If you cooked buttered desserts, place a small drip tray under the grill or line it with foil beforehand. This prevents grease from pooling on your carry bag.
- Ash (charcoal grills): Once cool enough to touch (roughly 10-15 minutes), brush ash into a disposable foil packet or small bag. Never pack while warm.
- Final check: Ensure the dome, grates, and burner controls are dry. Store in the carry bag with the same discipline you would use for any field kit, nothing loose, nothing damp.
Temperature Targets for Common Portable Grill Desserts
| Dessert | Indirect Temp | Time | Notes |
|---|---|---|---|
| Grilled Peaches | 375-400°F (direct heat) | 2-3 min | Char for caramel flavor; watch for flare-ups. |
| Banana Boats | 350°F (indirect) | 5-7 min | Keep foil loose so steam escapes; if too tight, filling stays cold. |
| Chocolate Fondant | 325-350°F (indirect) | 20-25 min | Edges set, center stays molten. Check at 20 min. |
| Chocolate Cake | 325°F (indirect) | 28-32 min | Toothpick inserted should emerge with a few moist crumbs, not dry. |
| Cheesecake | 300-325°F (water bath, indirect) | 40-50 min | Water bath prevents cracks. Replace hot water halfway if cooling fast. |
Next Steps: Build Your Portable Dessert Kit
Start with a single dessert recipe that fits your grill's footprint and your group's taste. To assemble a mess-free dessert toolkit, follow our leakproof transport prep system. Grilled peaches require only the grill and a 5-minute window, low risk, high payoff. Once you have proven the workflow, graduate to a 30-minute chocolate cake or fondant. From there, you will have the confidence to adapt recipes to your specific portable setup.
Your action: This weekend, fire up your portable grill, verify that your dome closure holds steady heat, and test a target indirect temperature of 350°F for 10 minutes. Note how long it takes to preheat and whether wind is a factor at your location. This single data point becomes your personal baseline for every dessert session to come. Pack the grill back into its bag. If you can do it cleanly and quickly, you are ready to feed a crowd (and finish with something sweet).